
 Follow

Step #9–Arching the Plates
Arching the Plates
If one looks at a violin-family instrument from the side, to see the front and back longitudinal arches simultaneously, it is easy to observe that the front and back are not arched the same. Some may argue that they began identical, but that since the stresses on front and back are not the same, the wood has crept, and the Old Master instruments are no longer the same shape they were when they were new. OK…I wasn’t there 300 years ago, so I don’t know…and if I had been, I’ll bet I wouldn’t remember. But we can see that, however they were back then, they are not the same now, and the best instruments have certain things in common: The back is essentially a circular curve; perhaps more accurately a curtate cycloid curve, or, possibly a catenary curve. The Curtate Cycloid seems to fit the best…it is sometimes called a hypocycloid, too. But the front is different– there is an area in the high middle that is nearly flat, by comparison with the back. The area between the f-holes and between the bouts flattens out considerably, compared to the back. This is an important difference, and is critical to the sound. Go online and look at a bunch of side-view photos of fine old violins. Once you see it, it is unmistakable.
Until a maker masters this aspect, it is really wise to make a set of longitudinal and cross-arching templates, and use them religiously until you can see the arching and tell whether it is right or wrong by personal experience. The archings will keep you out of trouble, just as using a map keeps a person from getting lost.
Make the templates and Use them!
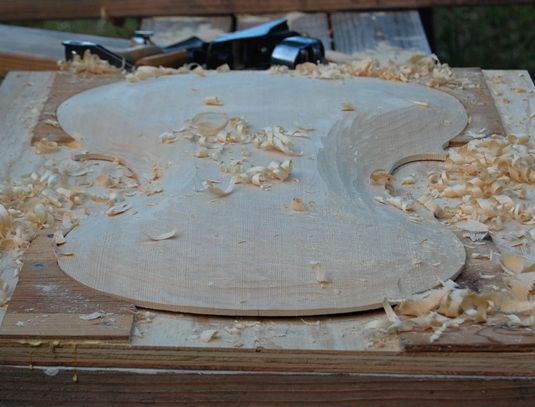
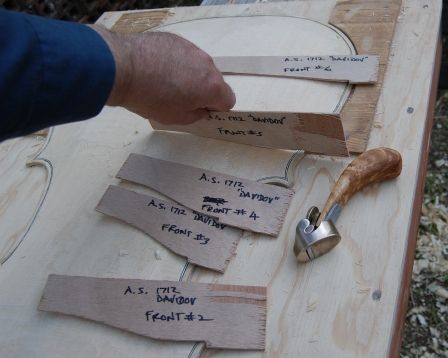
I used the drawings on the back of the Davidov poster to trace and cut out a set of arching templates. I have enough experience to start out without the templates, but not enough that I trust my eye to just cut the arches by instinct, or something of that sort. Here is the rough arching before I used the templates…you can sort of see the “table” area in the middle, where the shavings are sitting.
I rough out the front and back, using gouges and planes, and get the area around the edges pretty close to exactly the thickness I will want the finished edge. Then I intall purfling (which we talk about in the next topic), and use templates to finalize the arching. I have made a few instruments, so I have the confidence to get pretty far along in my arching before using a template. There is nothing wrong with using them from the first attack.
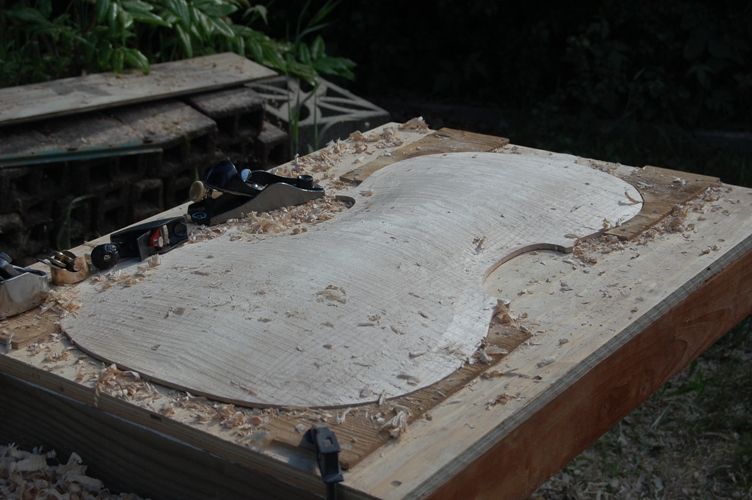
Here is the back, ready for purfling, but before using the templates. Still too “puffy” in places, but looking like a cello back.
Here are the templates in use (notice the purfling is in place).
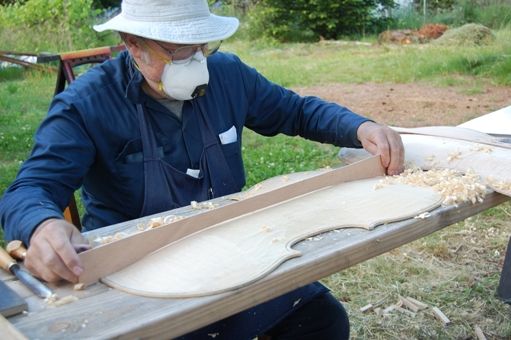
Front arching Template in use
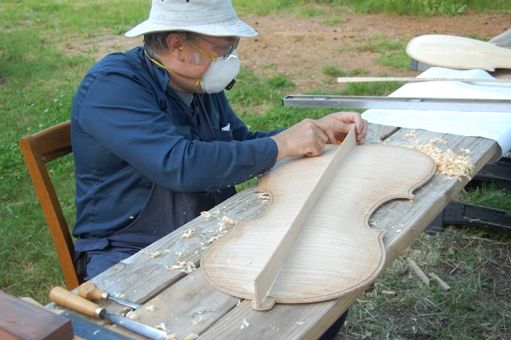
Here are the transverse arching templates: they are used in the same manner.
When the arching matches the templates as closely as I can manage, I begin using scrapers to smooth and give final shape to the plates. Then it is time for inside arching. But first, we need to talk about purfling, since that was done in the middle of this article.
Thanks for these interesting articles on Cello carving
Cb.2014
Glad you like them– I hope to continue them through the full process, but life tends to intervene. 🙂
Thanks for reading.
Hi Chet,
I’m an aspiring builder.I’ve watched your 2011 blog on your first (I think) cello a couple times for inspiration and orientation and now I cant seem to find it. If I search I get step #9 on arching but can’t get back to the beginning.Can you send me a link?
I’ve sent for a poster from The Strad and I want to get Henry Strobel’s book. Do you know where I might find it? I’m still in the “book” learning stage. I have woodworking experience-mostly cabinets and a few pieces of furniture but no instruments.
I’ve made friends with a couple who are both cellists in the Oregon Symphony so I’ll have some input from musicians .
I can see that you have been very helpful to many people. Thanks for your help and inspiration.
Bruce Weber Oregon City
Call me any time, and I will be glad to offer pointers, and encouragement. Blessings upon you…
Chet