
 Follow

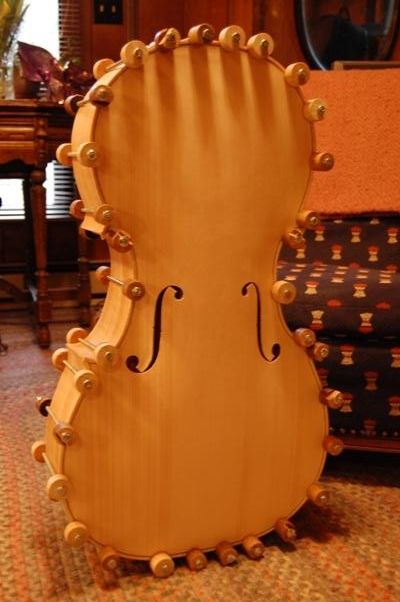
Cello Front Plate Installed
Spool Clamps and Hot Hide Glue
I used to be terribly stressed, whenever installing plates– even violin plates. Now I clamp the dry plate in place with spool clamps, then, beginning with the corner blocks and C-bout ribs, I remove a few clamps and use a palette knife to insert glue before brushing the outside of the joint clean with hot water, and replacing the spool clamps. In this way, I can get the whole job done very quickly, and with no fuss.
Error!
The fact is, as you see it, it looks as if everything is fine. The next photo shows what I did wrong, though. If you look closely, you can see that I forgot to remove the front plate of the mold before installing the front plate of the Cello.
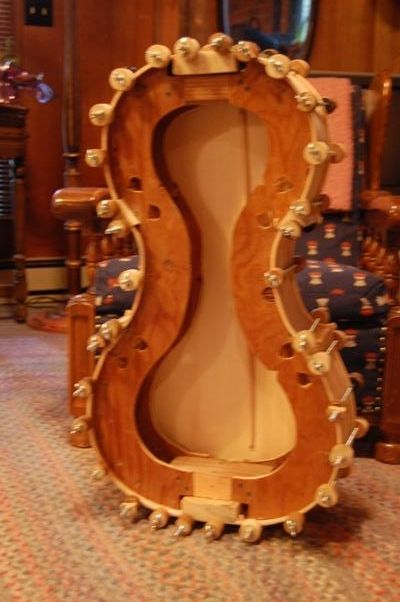
So…it is a good thing I now install plates in such a stress-free way. Sure, it was disgusting to have forgotten such an important step. But it only required a few minutes with a heat gun to remove the front cello plate, as the glue was quite fresh when I realized my error. And, after using my handy electric screwdriver to remove all the screws, I slipped the mold-plate halves out and set them aside, and immediately re-installed the front cello plate.
So, what’s next?
I need to finish the scroll, now, and install the fingerboard. I like to set the neck while the cello corpus is still on the mold, so that, once everything is correct, and the neck is glued in place, I can simply plane the heel flush with the back side of the ribs, and install the back plate. (Yes, I will remember to remove the rest of the mold first! … and clean up the interior, etc….) 🙂